 01924 910595
 Onlinepaintedparts@gmail.com
How to fit a painted mirror cover to your vehicle – Step-by-step guide
Share
If you’ve ordered a painted mirror cover for your vehicle, it’s now time to fit it and get your car or van back to its former glory!
In this guide, we’ll walk you through how to fit your new painted wing mirror cover safely and correctly!
No specialist tools are needed for most vehicles, and with a little care and patience you can do it yourself in under 15 minutes.
You will need -
-
A plastic trim removal tool (or a flat-head screwdriver wrapped in masking tape to prevent damaging the cover). Don’t have a removal tool? We sell them! Please visit our accessories section on our website.
-
A clean microfiber cloth
-
Optional: gloves to avoid fingerprints or marks on the paint
-
A well-lit, dry working space – Please do not attempt to fit a wing mirror cover in wet conditions as this will likely cause damage to your electrical elements of your wing mirror.
🔧 Step-by-Step Fitting Guide
Step 1: Prepare the Area
Clean around the mirror housing with a microfiber cloth. Remove any dirt and debris — this ensures a proper fit and avoids scratching the paint during fitting.
Step 2: Remove the Existing Cover
-
IMPORTANT – Remove your wing mirror glass first! Many online YouTube videos show people prizing off their wing mirror covers without taking their wing mirror glass off first, working from the outside.
While this is achievable, we strongly recommend taking off your wing mirror glass as it helps to prevent damage to your wing mirror housing or damage to the existing cover. Simply use a prizing tool and gently prize off your mirror glass working around the edges.
-
Next, unplug your wing mirror glass and put it aside safely. If you have a wing mirror indicator, unplug this from the housing too but do not remove the wing mirror indicator unless you are replacing this section also.
-
If you have lane/blind spot assist, remove this section from your wing mirror cover by pressing the clips inwards and pushing it through the cut-out.
-
Once you have removed your wing mirror glass and other elements, use your trim removal tool to gently pop off the existing cover from the inside out. This helps to avoid breaking any clips from your existing cover if you wish to keep those intact.
💡 Tip: If it feels like you’re forcing it, stop. Double-check for hidden clips.
Step 3: Inspect Your New Wing Mirror Clips & Housing
Before fitting your new painted cover, check:
-
All clips are intact
-
There’s no debris in the housing
-
The paint finish is clean and undamaged
This helps avoid any issues with fitment or scratching.
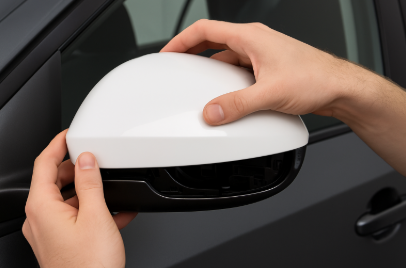
Step 4: Fit Your New Mirror Cover
-
Align the cover carefully with the mirror housing.
-
Taking great care of the wing mirror clips, press the cover gently into place, starting at one side and working around.
-
You’ll hear a light click as each clip slots into position.
Step 5: Final Check
-
Give the mirror a gentle tap to ensure the cover is secure
-
Ensure that you have successfully reinstalled your wing mirror glass, making sure that you’ve plugged the wires back in.
-
Adjust the mirror glass to ensure it moves freely
-
Stand back and admire the fresh, colour-matched look!
If you prefer visuals, we recommend visiting this YouTube video which properly displays how to remove and install wing mirror covers - https://www.youtube.com/watch?v=vR1aXdYzPu0